 11 Oct 2026
Before taping an ankle, consider whether it is safe to tape at all. If you’re wondering how to tape an ankle for support, it’s understandable to be unsure which tape to use, where to place it, or how snug it should feel. Tape may offer temporary support, but it shouldn’t cause numbness, tingling, color changes, or increased pain. It also can’t rule out a more serious injury.
This guide covers a cautious basic taping approach, including the difference between firm athletic tape and flexible kinesiology tape. You’ll learn how to position your ankle, apply support without overtightening, and recognize signs such as severe pain, marked swelling or bruising, and difficulty bearing weight that call for prompt professional evaluation. We’ll also explain when taping may not be enough. If ankle symptoms persist or limit your activity, individualized guidance from a sports medicine or rehabilitation professional can help you decide what to do next. Fresno-area residents can access ankle pain care, sports medicine consultations, and physical therapy through Premium Sports & Orthopedic Center.
Key Takeaways
- Understand what ankle taping may support and why it can’t diagnose or heal an injury.
- Learn how to tape an ankle for support with a cautious, general method that prioritizes comfort and a safe fit.
- Compare athletic tape, kinesiology tape, an ankle brace, and no added support to identify factors that may guide your choice.
- Recognize when ongoing pain, repeated ankle giving-way, or limits on activity warrant professional assessment.
- Explore how sports medicine and physical therapy in the Fresno area can help guide next steps for ankle pain.
What Ankle Taping Can Support, and What It Cannot Do
Ankle tape is applied around the foot and ankle to provide external support. Depending on the tape and how it is applied, it may limit some movement or remind you to move carefully. Some people feel more secure wearing it during an activity such as practice or a walk. That feeling may be helpful, but it doesn’t show whether the ankle is safe to load or whether an injury is healing.
Ankle sprains are a common reason people consider taping. A sprain involves stretching or tearing ligaments, the tissues that help stabilize a joint. The general overview of Ankle Sprain describes this type of injury, but neither a webpage nor a tape application can determine what has happened in your ankle. Pain and swelling can have different causes, and an injury’s severity may not be obvious from how it looks or feels at first.
“Tape can provide temporary support during activity, but it does not treat or repair the underlying ankle injury.” It can’t confirm whether you have a mild sprain, a more serious ligament injury, or another problem. It also shouldn’t replace an individualized care plan. If symptoms persist, recur, or interfere with everyday movement, a professional evaluation can help clarify next steps.
When might ankle taping be useful?
For some people, taping may offer limited, activity-related support after an injury has been assessed or as part of guidance for a specific activity. It isn’t right for everyone. Comfort and response depend on the injury, activity, skin tolerance, and application technique. If you’re learning how to tape an ankle for support, treat the method as general education, not a reason to push through symptoms.
Notice how your ankle responds as you move. Stop the activity if pain increases, the ankle feels unstable, or swelling worsens. Don’t add more tape to mask those changes.
When should you avoid self-taping and seek assessment?
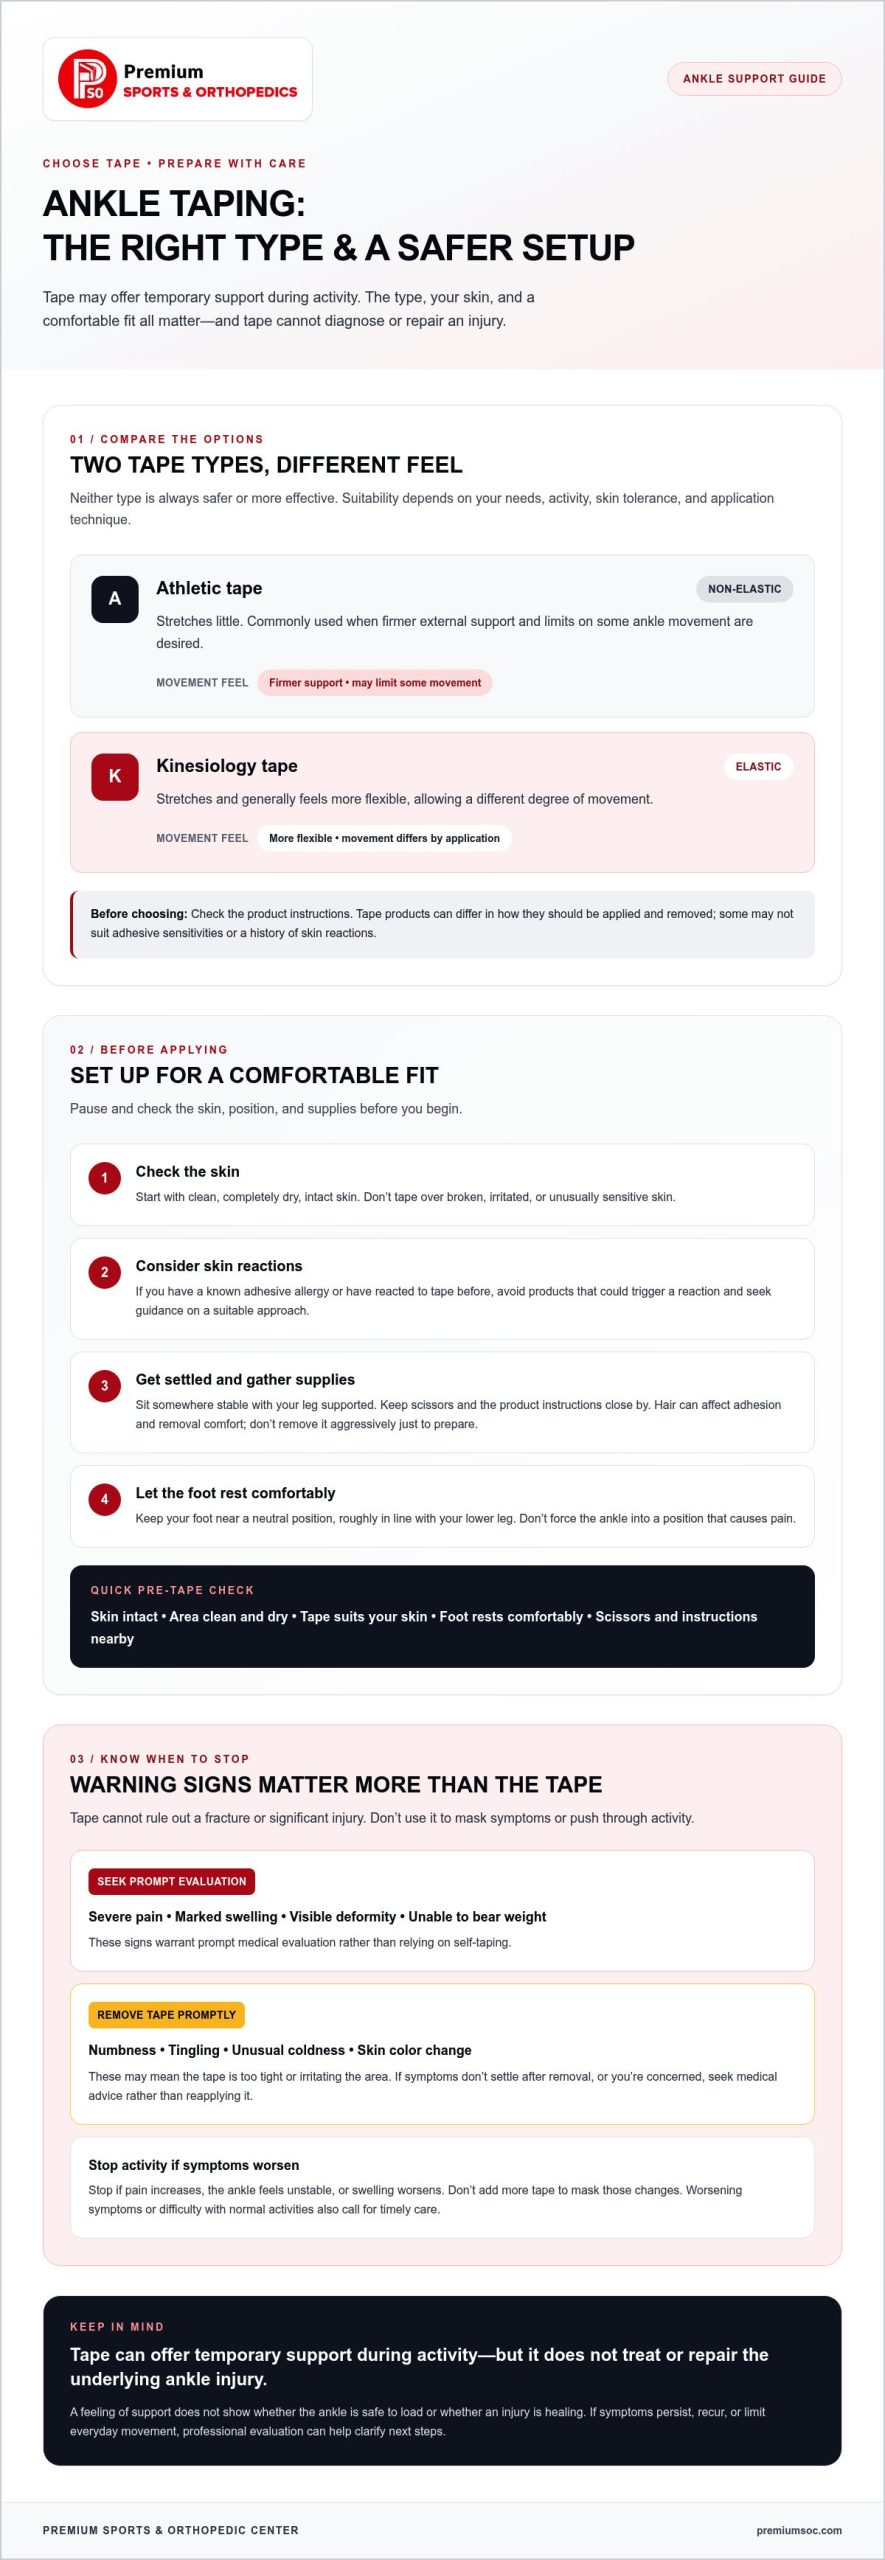
Don’t rely on self-taping if you have severe pain, marked swelling, visible deformity, or can’t bear weight. These signs warrant prompt medical evaluation because tape can’t rule out a fracture or significant injury. Seek timely care as well if symptoms are worsening or make normal activities difficult.
If tape causes numbness, tingling, unusual coldness, or a change in skin color, remove it promptly. These may be signs that the tape is too tight or irritating the area. If symptoms don’t settle after removal, or you’re concerned about the ankle, seek medical advice rather than reapplying the tape.
Choose the Right Tape and Prepare Your Ankle
Your choice of tape affects how support feels and how much your ankle can move. Before opening a roll, consider the activity, your skin’s sensitivity, and whether you’ve been advised to use a particular type. No tape suits every person or situation. If you’re unsure whether taping is appropriate for your ankle, individualized guidance can help you choose a safer approach.
Athletic tape or kinesiology tape: what is the difference?
Non-elastic athletic tape stretches little, so it’s commonly used when firmer external support and limits on some ankle movement are desired. Elastic kinesiology tape stretches and generally feels more flexible, allowing a different degree of movement. Neither type is always safer or more effective. The right option depends on your needs, skin tolerance, activity, and application technique.
Check the package before use. Tape products can differ in how they’re meant to be applied and removed, and some may not suit people with adhesive sensitivities or a history of skin reactions. Don’t assume a familiar tape is suitable for a new injury or extended wear.
Check the skin and position your foot
Start with clean, completely dry skin so the tape can adhere as intended. Don’t apply it over broken, irritated, or unusually sensitive skin. If you have a known adhesive allergy or have reacted to tape before, avoid products that could trigger a reaction and seek guidance on a suitable approach. Hair can affect adhesion and removal comfort, but don’t remove hair aggressively just to prepare the area.
Sit somewhere stable, with your leg supported and scissors within easy reach. Let your foot rest comfortably near a neutral position, roughly in line with your lower leg. Don’t force your ankle into a position that causes pain. Follow the manufacturer’s instructions for skin use, application, wear, and removal. If a step hurts or feels difficult, pause rather than pulling your foot or the tape into place.
Before taping, check that your skin is intact, the area is clean and dry, the tape suits your skin, your foot rests comfortably, and you have scissors and the product instructions close by. These checks help you prepare without treating tape as a substitute for assessment. For guidance on matching ankle support to your symptoms and activity, a sports medicine consultation can help you consider appropriate next steps.
Ankle Taping Compared with a Brace or No Tape
Tape isn’t the only way to support an ankle, and extra support isn’t necessary for every activity. A removable brace offers a different balance of convenience and adjustability, while moving without added support may feel comfortable if your ankle is stable and symptom-free. Each option has practical trade-offs. The right choice depends on your symptoms, activity, skin tolerance, and any guidance you’ve received from a clinician.
“The best ankle support is the one that fits the person, the activity, and the situation, not a one-size-fits-all rule.” Neither tape nor a brace guarantees protection from injury or replaces rehabilitation. Support can be part of a broader plan, but it doesn’t address every factor that affects ankle strength, control, and confidence.
How does taping differ from wearing an ankle brace?
Tape is applied directly to the ankle for a particular session. A removable brace is a wearable device that can be taken off and put back on. Tape’s feel and consistency may vary depending on placement and technique. A brace may be easier to adjust between activities, though fit and comfort still matter.
Neither option is automatically better. Consider whether you can apply tape comfortably and consistently, whether a brace fits your footwear and activity, and whether either option irritates your skin or makes movement uncomfortable. If you’ve had a significant injury or symptoms keep returning, a clinician can help guide the decision instead of relying on trial and error.
When might no added support be the better choice?
If everyday movement is comfortable and your ankle feels steady during the activity you plan to do, you may not need tape or a brace. Extra support may be unnecessary if it adds discomfort or restricts movement. Still, being symptom-free during one task doesn’t prove your ankle is ready for every level of activity, especially after an injury.
Don’t use tape to push through pain, a sense of giving-way, or worsening symptoms. Stop and reassess instead. After a significant or recurring ankle injury, individualized sports medicine or rehabilitation guidance can help you decide whether external support fits your activity and recovery plan.
When weighing the options, focus on function rather than appearance. Think about the movement you want to do, how your ankle responds, and whether the support stays comfortable as you move. If tape feels secure at first but becomes painful or irritating, take that seriously rather than tightening it or continuing the activity.
- Tape: Applied for a session; results depend on application skill, skin tolerance, and comfort.
- Brace: Removable and reusable; fit, ease of adjustment, and comfort vary.
- No added support: May suit comfortable, stable movement, but isn’t a reason to ignore symptoms.
Learning how to tape an ankle for support can help you understand one option, but your choice should reflect your ankle’s condition and the demands of your activity. If you have ongoing uncertainty, pain, or repeated instability, a professional can assess how your ankle functions and discuss appropriate next steps, including rehabilitation guidance.
How to Tape an Ankle for Support: A Cautious Step-by-Step Method
The steps below are general education, not a personalized treatment plan. Ankle shape, symptoms, skin sensitivity, and the activity you’re preparing for can all affect how tape should be applied. If you haven’t been shown how to apply tape, consider getting hands-on guidance rather than improvising a tight wrap.
Use the tape type and skin preparation described earlier, and sit with your leg supported. Keep your foot relaxed near a neutral angle, roughly in line with your lower leg. Don’t force it into position or pull the tape tightly to create a feeling of security. Strips should lie flat and smooth, with enough room for comfortable foot movement.
Apply the anchor and support strips
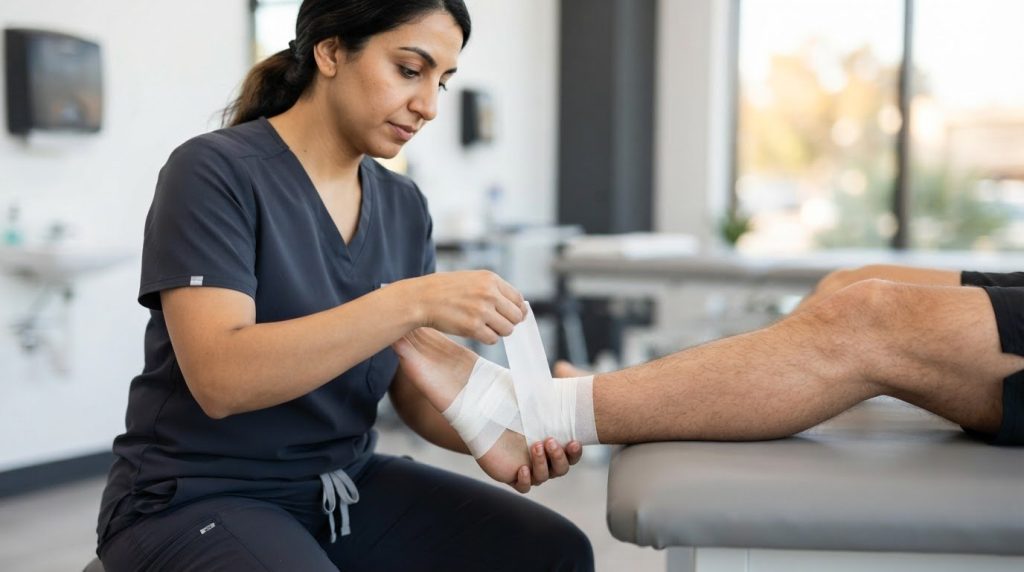
- Place light anchors. Lay a strip around your lower leg just above the ankle, without squeezing. Add another around the midfoot, keeping it clear of your toes and avoiding pressure across the foot. Anchors give later strips a surface to attach to, but they shouldn’t feel restrictive.
- Add stirrup strips. Starting at one side of the lower-leg anchor, guide a strip down toward the ankle, beneath the heel, and back up the opposite side to the anchor. Add another stirrup beside it with slight overlap if comfortable. Keep the tape smooth. Don’t pull the skin or press hard beneath the heel.
- Use a figure-eight pattern only if suitable. If the method feels comfortable and is appropriate for you, guide a strip across the top of your foot, around the ankle, and back across the foot in a figure-eight path. Keep the overlap even and the tension light. Stop if the pattern causes pain, pinching, or a feeling that movement is being forced.
These strips provide external support, not a rigid cast. Leave your toes visible so you can check them, and don’t cover skin in a way that makes it difficult to monitor color or irritation. If you can’t apply the strips smoothly or comfortably, remove them and seek guidance instead of adding layers to compensate.
Check the fit and know when to remove the tape
Check your foot immediately after application. Compare its color and warmth with the other foot, notice whether sensation feels normal, and gently move your toes and ankle within a comfortable range. The tape should feel secure, not painful or constricting. Check again during activity because discomfort can develop once you start moving.
- Remove the tape promptly if pain increases, swelling develops, or you notice tingling, numbness, unusual coldness, a color change, or skin irritation.
- Don’t sleep, exercise, or continue an activity in tape against clinical advice.
- If you can’t remove the tape comfortably or symptoms persist after removal, seek medical guidance.
For help deciding whether taping fits your symptoms and activity, schedule a sports medicine consultation for individualized guidance.
When Fresno-Area Ankle Pain Needs Professional Guidance
Taping can’t explain why your ankle hurts or keeps feeling unreliable. Consider a professional assessment if pain persists, your ankle repeatedly gives way, or symptoms limit walking, work, exercise, or sports. These patterns deserve attention even if you can still put weight on your foot. A tape wrap may change how movement feels, but it can’t identify the source of symptoms or determine which activities are appropriate.
Seek prompt medical evaluation for severe pain, marked swelling, deformity, or inability to bear weight. For ongoing or recurring problems, an assessment can help you move beyond guesswork about how to tape an ankle for support and toward a plan based on your symptoms and goals.
What can an ankle evaluation help clarify?
A clinician can discuss when symptoms began, which movements aggravate them, and whether your ankle feels stable during daily tasks or sport. They can also assess function and use those findings to guide appropriate next steps. A description of symptoms alone can’t confirm a sprain or determine its severity, so don’t assume that taping is enough. Fresno-area residents can explore sports medicine care in Fresno for support with ankle concerns.
It can help to note what you can and can’t comfortably do, whether symptoms are improving or worsening, and what support you’ve tried. Share that context during your assessment. The goal is to understand how your ankle is functioning, not simply to choose a wrap.
How can rehabilitation support a return to activity?
Physical therapy can provide individualized guidance for mobility and functional recovery. A rehabilitation plan may address the movements and activities that matter to you, with progress shaped by symptoms, assessment, and activity demands. Returning to sport, for example, can involve different physical demands than resuming comfortable everyday walking. Follow the guidance you receive rather than using tape as a signal that your ankle is ready for more.
Recovery isn’t always a straight line. If an activity brings back pain or instability, share that response with your care team so the plan can reflect how your ankle is functioning. Readers in the area can learn about sports medicine consultations in Clovis as one way to explore individualized guidance.
With a clearer understanding of your symptoms and function, you can make more informed decisions about support and activity. If ankle pain is lingering or holding you back, consider an assessment at Premium Sports & Orthopedic Center, which provides ankle pain care, sports medicine consultations, and physical therapy for Fresno-area residents.
Plan Your Next Step Toward Confident Movement
As you decide what to do next, focus on the movement you want to return to, not only the support you can apply today. Note which activities feel comfortable, what still feels uncertain, and how your ankle responds during your usual routine. Bringing those observations to a care conversation can make it more specific to your everyday needs and goals.
Learning how to tape an ankle for support can give you a practical starting point, but tape alone can’t tell you what your ankle needs over time. If pain or instability is shaping your choices, individualized guidance can help you make a thoughtful plan. You don’t have to figure out the next step on your own.
Explore sports medicine care at Premium Sports & Orthopedic Center for support with ankle concerns and a plan suited to your needs. With the right guidance, you can keep working toward movement that feels comfortable, steady, and confidence-building.
Frequently Asked Questions
Can I tape my ankle and keep playing sports?
Only if your ankle is suitable for that activity. Tape by itself doesn’t make playing safe. Don’t use it to get through pain, a feeling that your ankle may give way, or symptoms that worsen as you move. Stop if your ankle becomes more uncomfortable during warm-ups or drills. Knowing how to tape an ankle for support doesn’t diagnose an injury or guarantee protection from another one. Seek professional guidance for persistent or significant symptoms.
How tight should ankle tape feel?
Ankle tape should feel supportive, not constrictive. Your foot should stay normally warm and colored, with usual sensation and comfortable movement. Compare both feet after taping and gently move your toes. The taped side shouldn’t feel compressed or increasingly uncomfortable. Remove the tape if pain increases or you notice tingling, numbness, swelling, or a color change. If symptoms continue after removal, seek medical advice.
Can I tape my ankle if it is swollen?
Swelling can make it harder to judge tape fit and pressure, so taping isn’t automatically appropriate. Don’t use a wrap to manage marked or increasing swelling, severe pain, or difficulty bearing weight. Those symptoms call for medical evaluation rather than self-treatment. If a clinician has recommended taping for your situation, follow their directions and monitor how your foot feels. Remove the tape if discomfort or circulation-related symptoms develop.
How long can I leave ankle tape on?
There isn’t one wear time that suits every tape or ankle. Follow the product’s instructions and any clinician guidance, taking your activity and skin response into account. Remove the tape if you develop irritation, discomfort, numbness, tingling, swelling, or a change in skin color. Don’t leave it on longer just because it still feels secure. If you’re unsure about wear time after an injury, seek advice specific to your situation.
Should I tape both ankles or only the injured one?
You don’t need to tape both ankles just to make them match. Support decisions should relate to your symptoms, planned activity, and professional guidance, not symmetry alone. Avoid making taping an uninjured ankle a routine prevention habit without a specific reason. If either ankle has recurring pain or feels unreliable during a familiar activity, an assessment can help clarify appropriate support and next steps.
Can ankle tape cause a skin reaction?
Yes, adhesive tape can irritate skin or trigger sensitivity in some people. Don’t apply it to broken or already irritated skin, and follow the product’s instructions for use and removal. Take it off if burning, itching, a rash, or unusual discomfort appears. If a reaction is severe, spreads, or doesn’t improve after removing the tape, seek medical advice. A previous reaction is a reason to be cautious with adhesive products.
Can I wear shoes over a taped ankle?
Yes, if your shoe fits comfortably without pressing on the tape or changing how your foot feels. Don’t force on footwear that feels unusually tight, increases pain, or brings on numbness. A swollen foot may not fit its usual shoe safely, so avoid squeezing it in. Choose comfortable footwear that doesn’t compress the taped area. If swelling persists or walking is difficult, seek professional assessment rather than relying on a tighter shoe or more tape.